Instructions for Setting Up Azure Cloud
- Create a subscription by visiting subscription page
- You may choose Pay-As-You-Go
- Visit
Home > Subscriptionsand take a note of your subscription ID (You will need this ID for elasticluster’s config ).
-
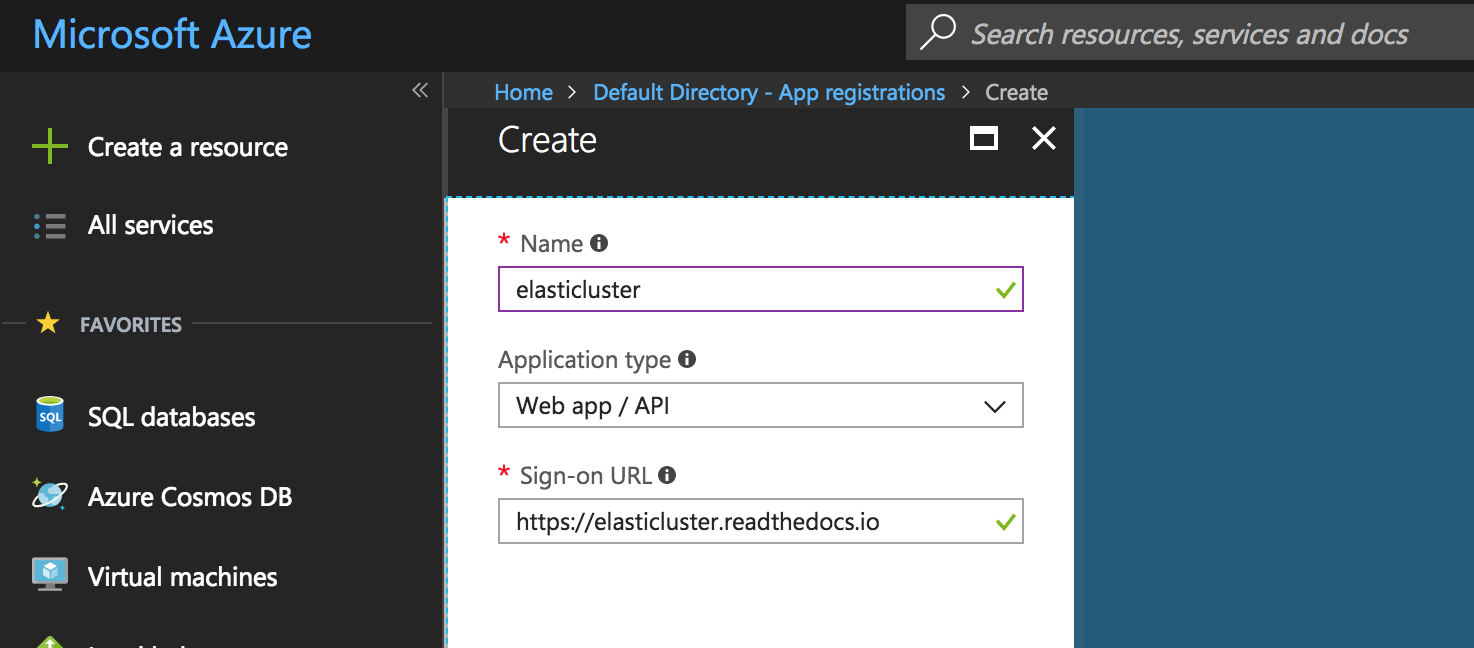
Create an application as described in Azure Register Application to get an application ID, a secrete key, and a tennant ID for authetication purposes.
- Register an application that can access compute, storage and network resources.

- Save your application ID somewhere locally (e.g., in elasticluster’s config)
- Create a secret key by going to
> Settings > Keysof your application. Save the secret key of your application somewhere safe (e.g., in elasticluster’s config). You will not be able to retrive this value at a later time. - Get you tennant ID from
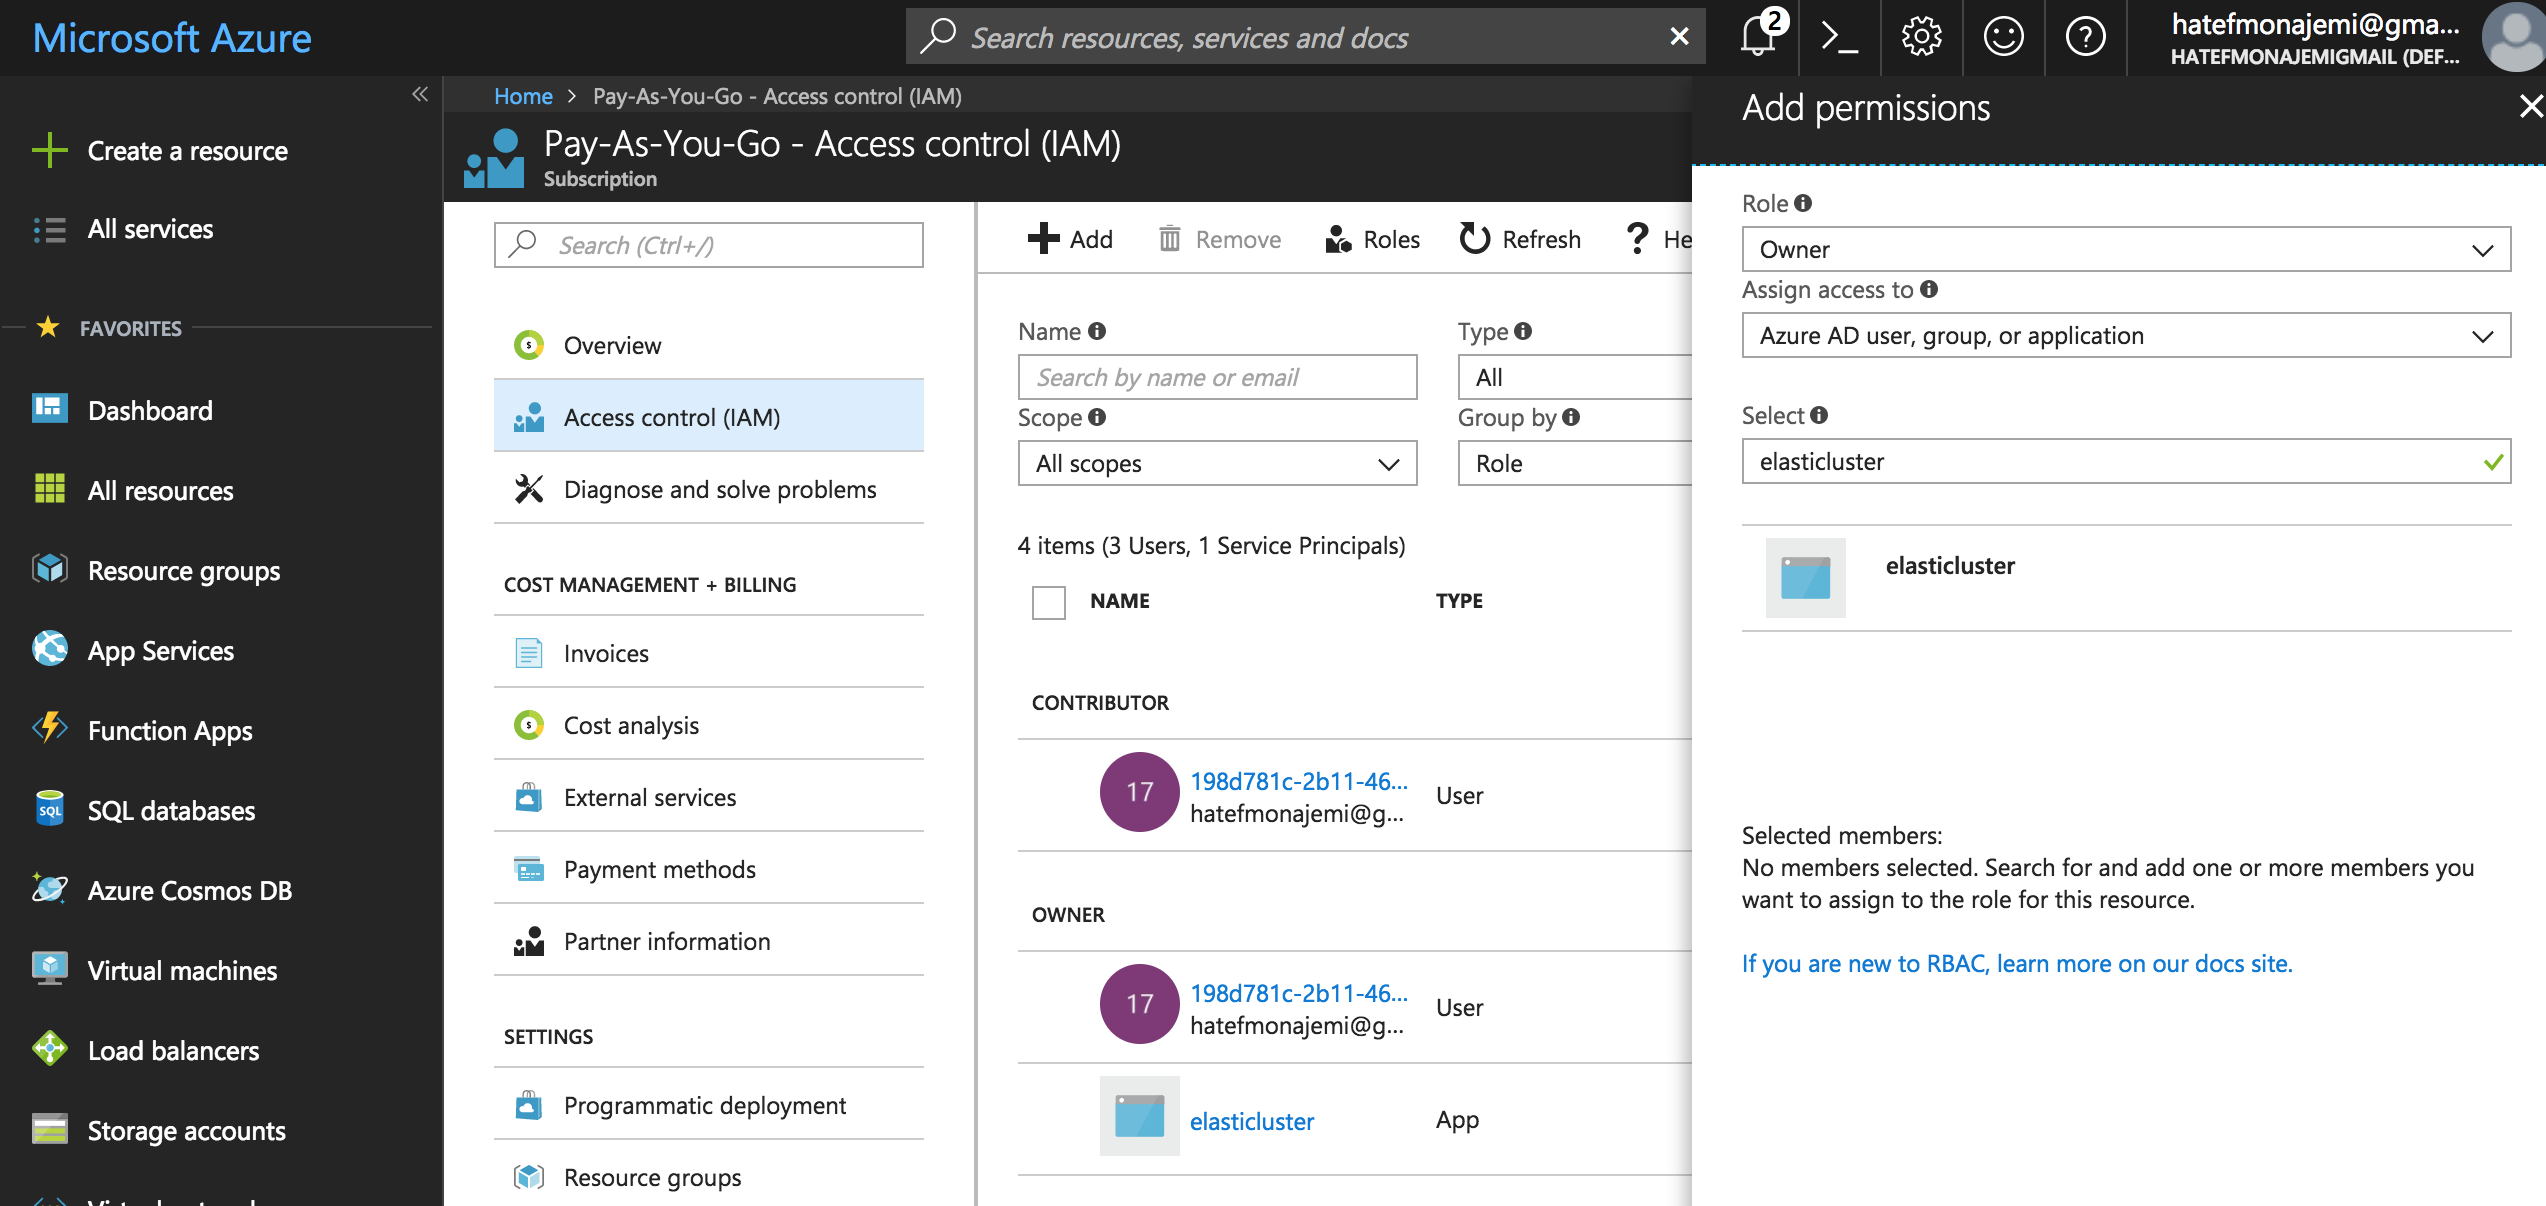
Azure Active Directory > Properties > Directory ID. Save it somewhere (e.g., in elasticluster’s config) - Go to your Subscription’s Access Control (IAM) section and add the Owner role to your application (eg. elasticluster) as shown below.

Please note that you application need to have an
Ownerrole in your subscription in order to getwriteaccess. You should think of your application as a user with certain roles. If you don’t do this step, you will get error while building your cluster. - Register an application that can access compute, storage and network resources.
-
If you do GPU computing, you will need to request a number of Standard_NC, Standard_NCv2, Standard_NCv3, or Standard_ND (e.g., Standard_ND12 give you 2 P40-GPUs with 12 vCPUs) instances (See GPU instances). You can request quota increase by visiting Azure Quota Page. You need to create a support request for the number of allowable cores for particular GPU instances by going to
Help + supportor your Azure portal (question mark on the right side of the top navigation bar). The default number of vCPUs is 20. Visit Azure Instance Types and Pricing to see what fits your needs. - To see a list of VM images that you can use, visit Azure Image List